Acknowledgements
Much of the following is detailed in a white paper by Wim Decorte and Steven Blackwell, which can be found here. We are including the step by step directions in this post for completeness of this Keycloak series, but we once again thank them for their contributions in this area.
Hardware Requirements
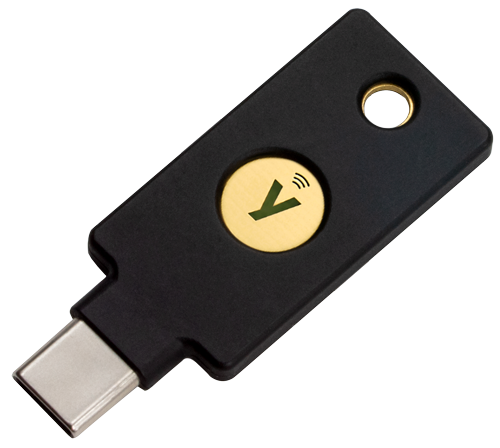
Passwords are pretty insecure - how many sites do you use the same password for? Exactly. Secure password-less authentication can be achieved in a few ways but we're going to explore the hardware security key called YubiKey made by Yubico. Some people's reaction to purchasing a security device for about $50 will be something like, "Hell no, I'm not spending that much on security, my password is fine." And fair enough, but before you go, how much would it cost you if your database got hacked, and maybe all your records got deleted or, worse, stolen because you use the same password for that as a service that got compromised recently?
Ok, with that settled, head over to the Yubico website and their YubiKey 5 product and snag yourself one or two - look online for a coupon too, we saved $10 by doing so. We ended up with the YubiKey 5C NFC product as that seemed like it would suit our situation best. Some models are also available at Amazon and other retailers.
Configuring Keycloak
With our YubiKey in hand, it's time to configure Keycloak to use it as a password-less authentication method. Open the Keycloak Administrator Console by going to https://DOMAIN_SUBDOMAIN/auth/admin, ensure the correct realm is selected, click the Authentication menu option on the left and then the WebAuthn Passwordless Policy tab.
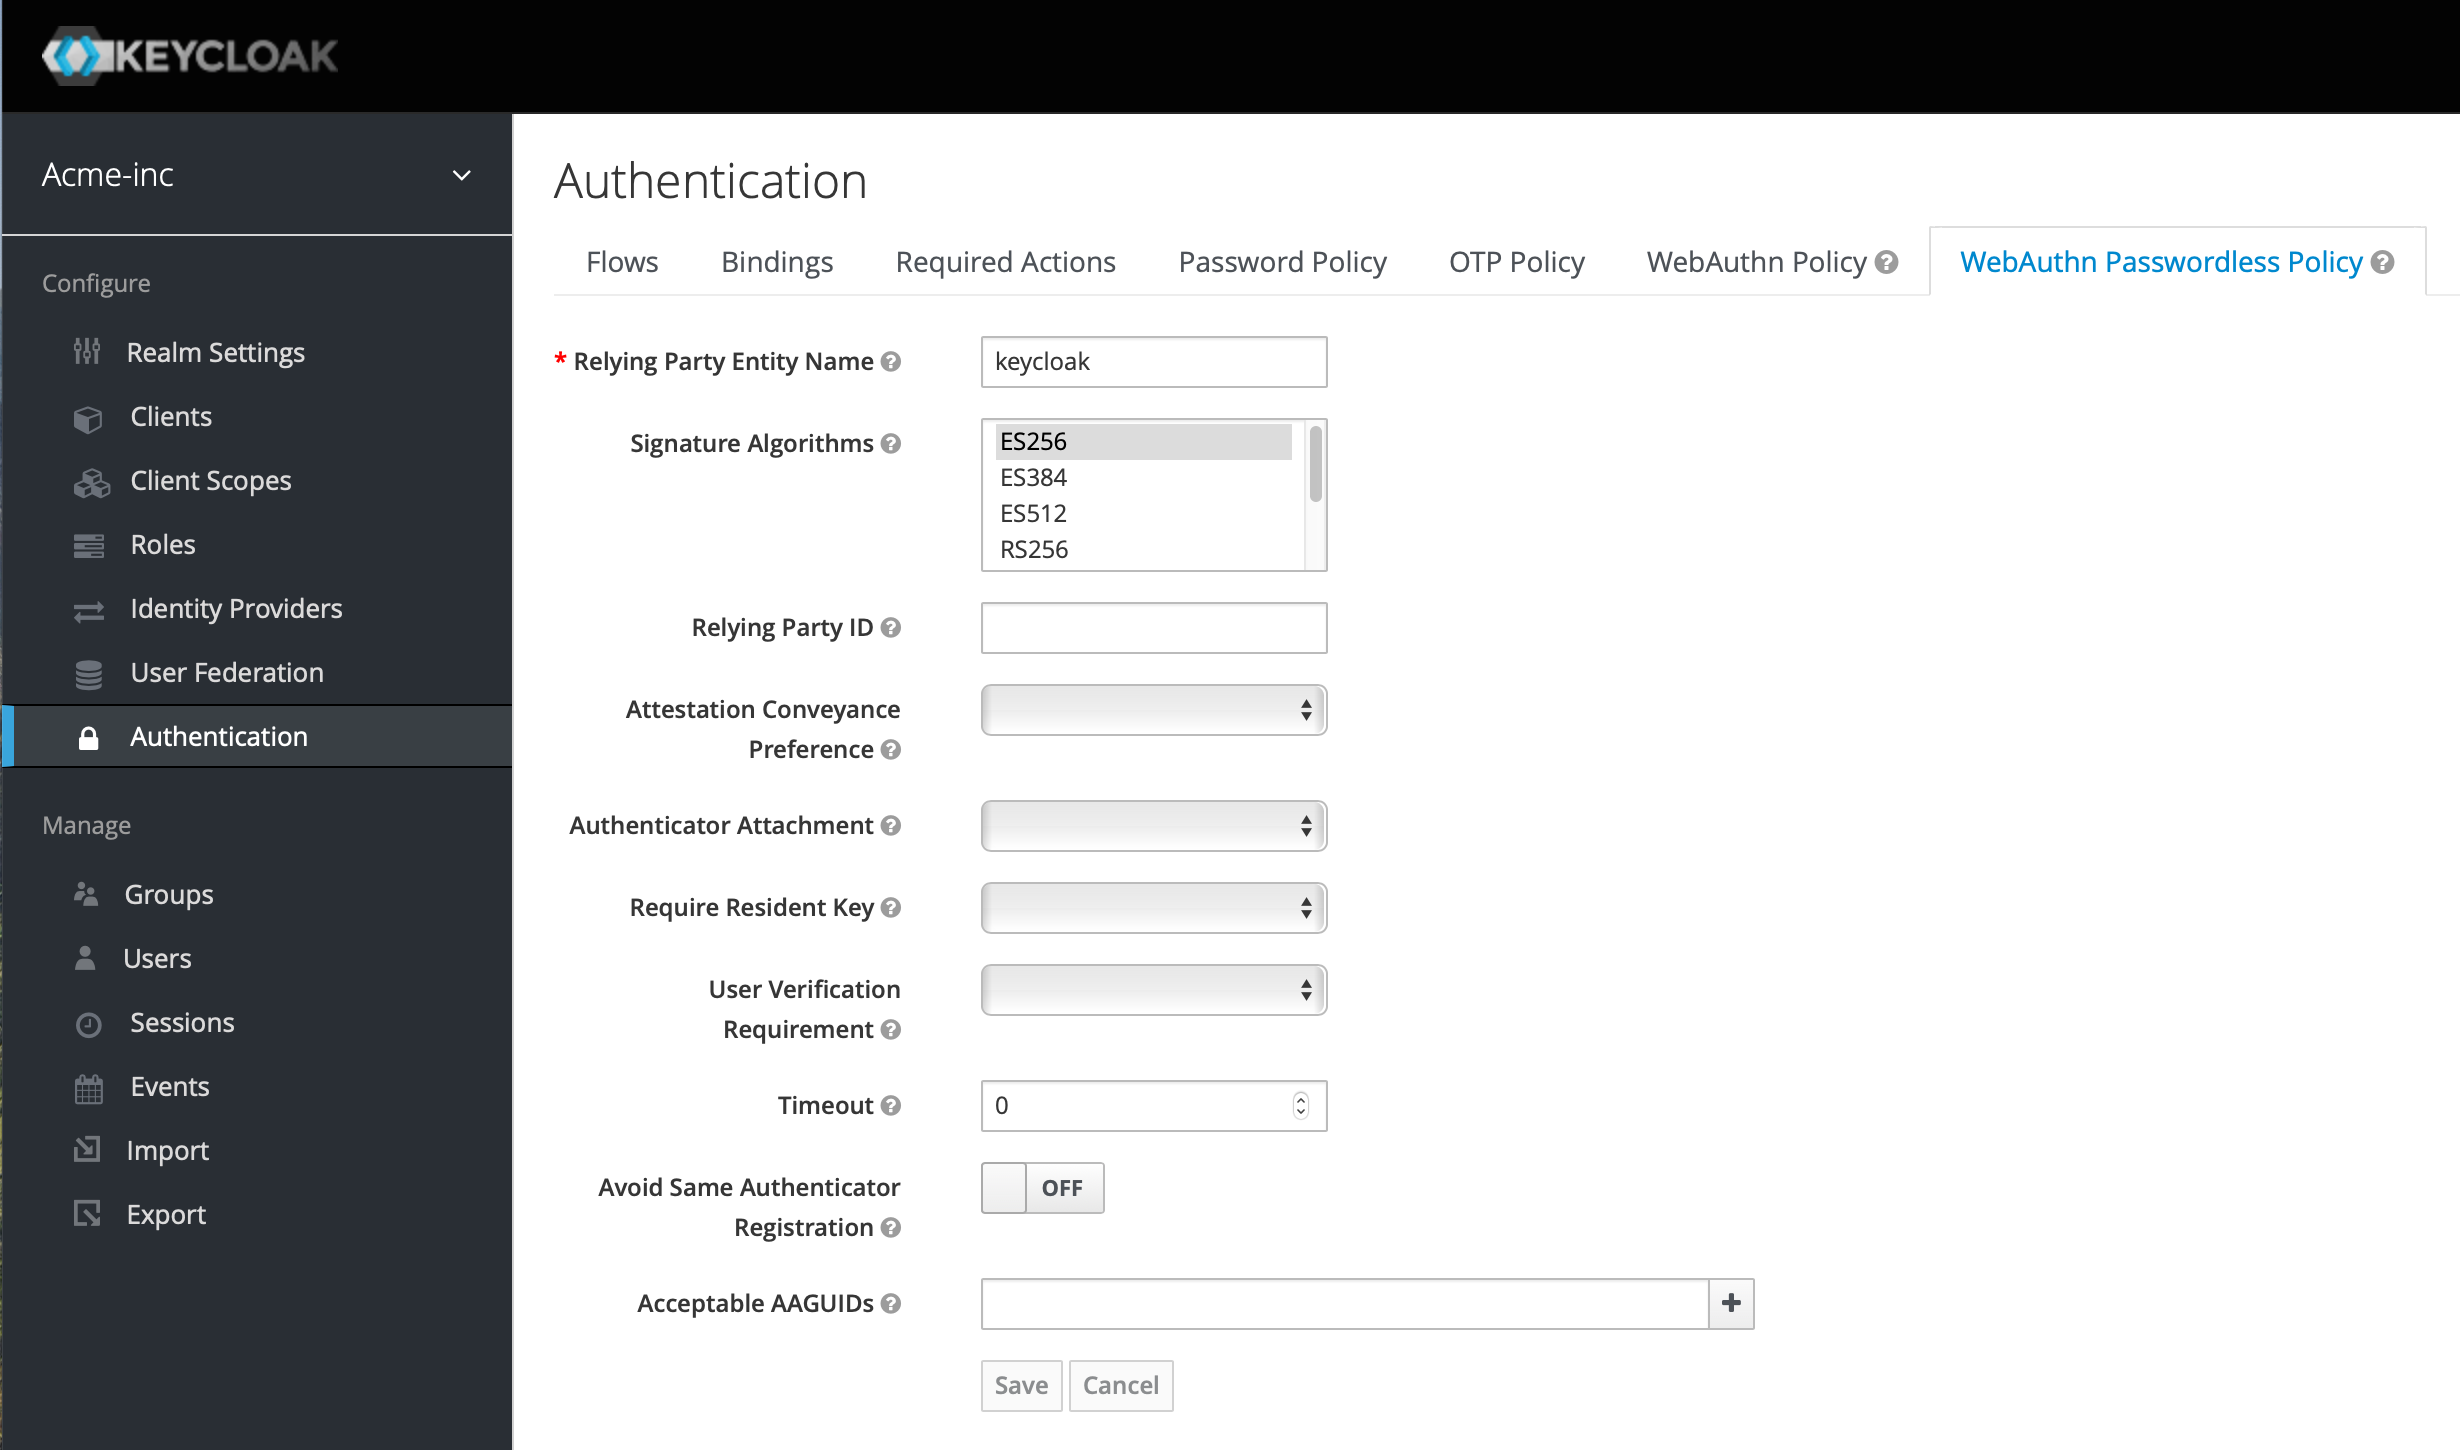
In the Relying Party ID field, add the domain name of your Keycloak server, omitting the https etc - something like keycloak.mydomain.com. Just under that is the field Attestation Conveyance Preference and you should set that to Direct. Hit Save at the bottom and wait for a moment until you get the green confirmation message pop up.
Click on the Required Actions tab and in the top right, hit the Register button, ensure Webauthn Register Passwordless is selected and hit Ok.

Next up, we're headed to the Flows tab, ensure the Browser flow is selected from the dropdown in the top left, and then on the right hit the Copy button, name the new flow Browser WebAuthn Passwordless and hit Ok.

Your new flow should be the selected one in the top left and we're going to delete the Conditional OTP entry that is likely the third row from the bottom. Click the Actions button on the end of the row and choose Delete.
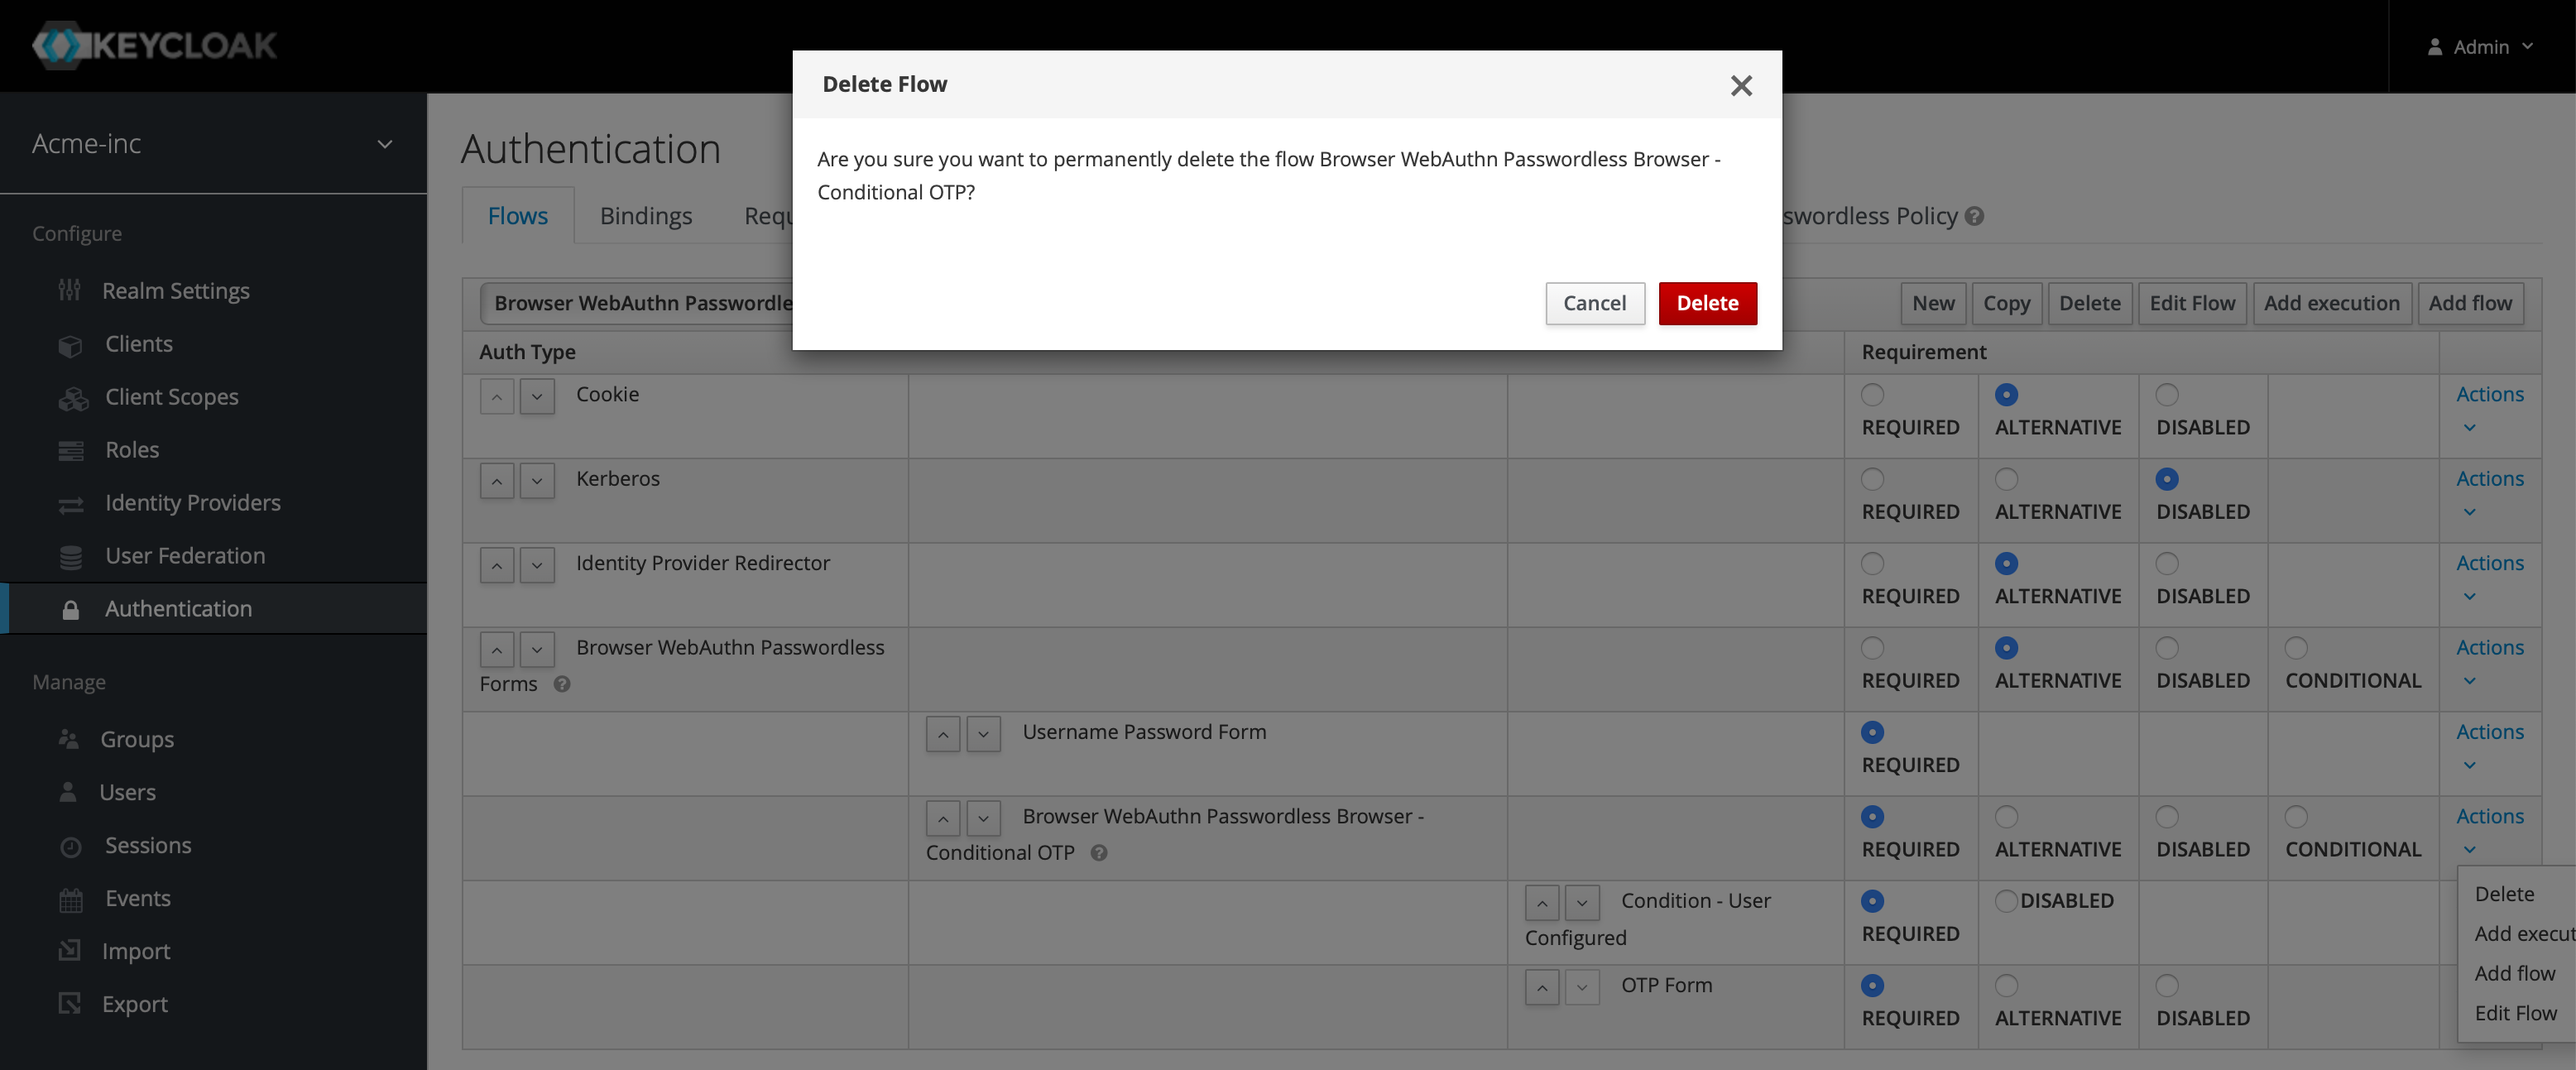
Do the same for the Username Password Form that is likely the bottom row. Having deleted the Username Password Form, we're going to have to add a couple of executions to our Browser WebAuthn Passwordless Forms entry so our flow works as expected. On the end of that row, hit the Actions button again and Add Execution.
You'll be taken to a Create Authenticator Execution screen and in the Provider drop down, select Username Form and hit Save - this will prompt the user to enter their username at the beginning of the login process.
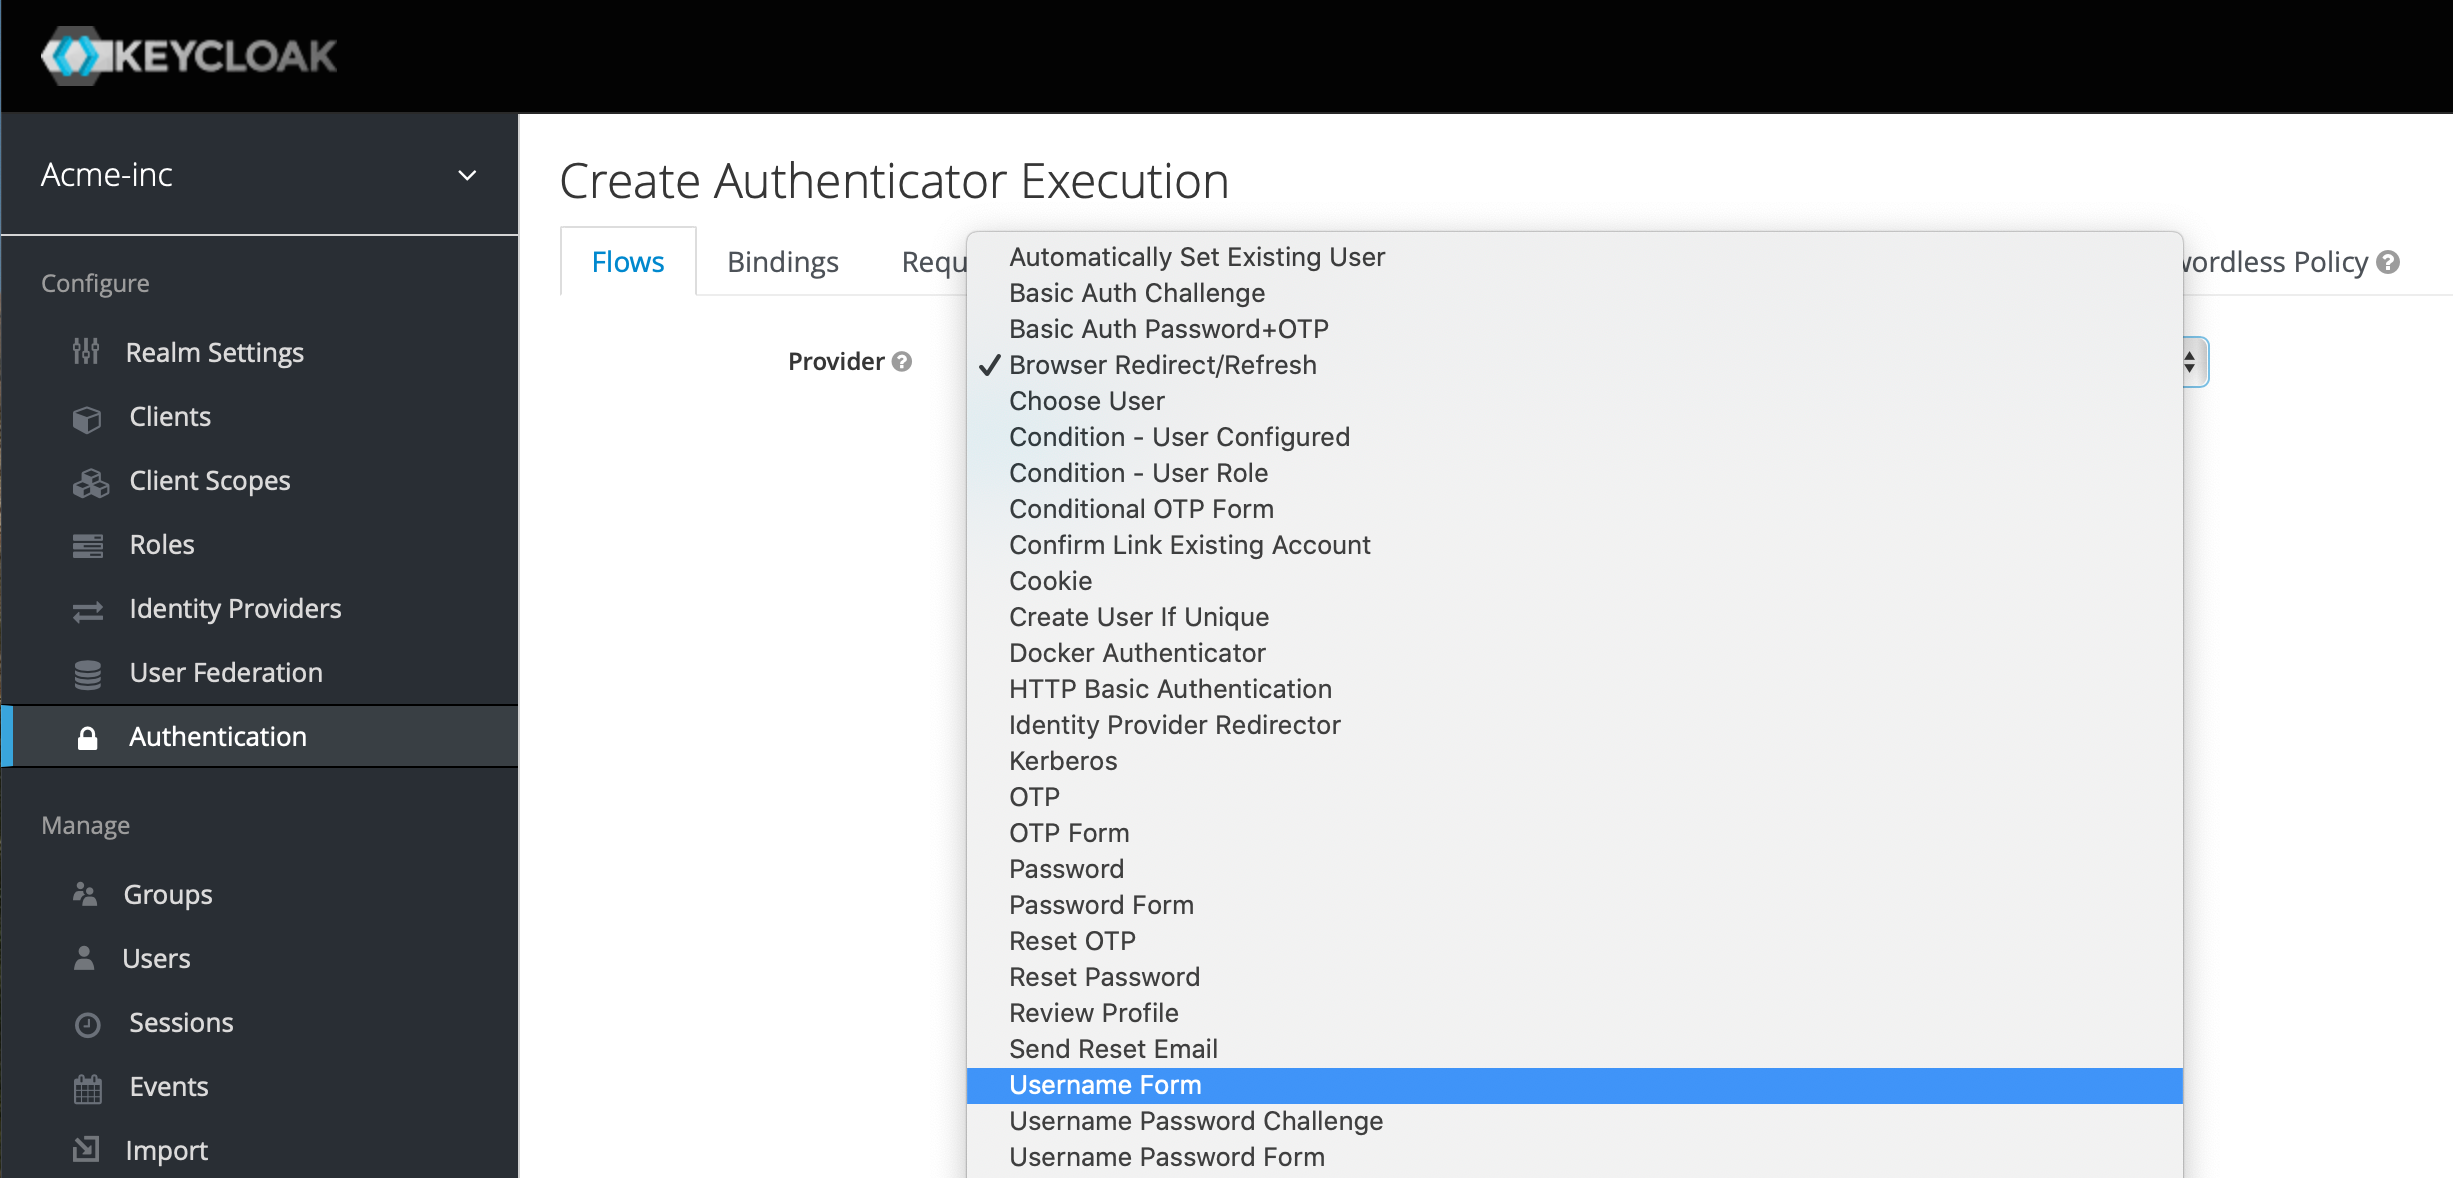
Add another Execution under the Browser WebAuthn Passwordless Forms row, but this time select WebAuthn Passwordless Authenticator and after clicking Save, ensure that this and the Username Form are set to Required as below, with the Username Form being the first in the list:

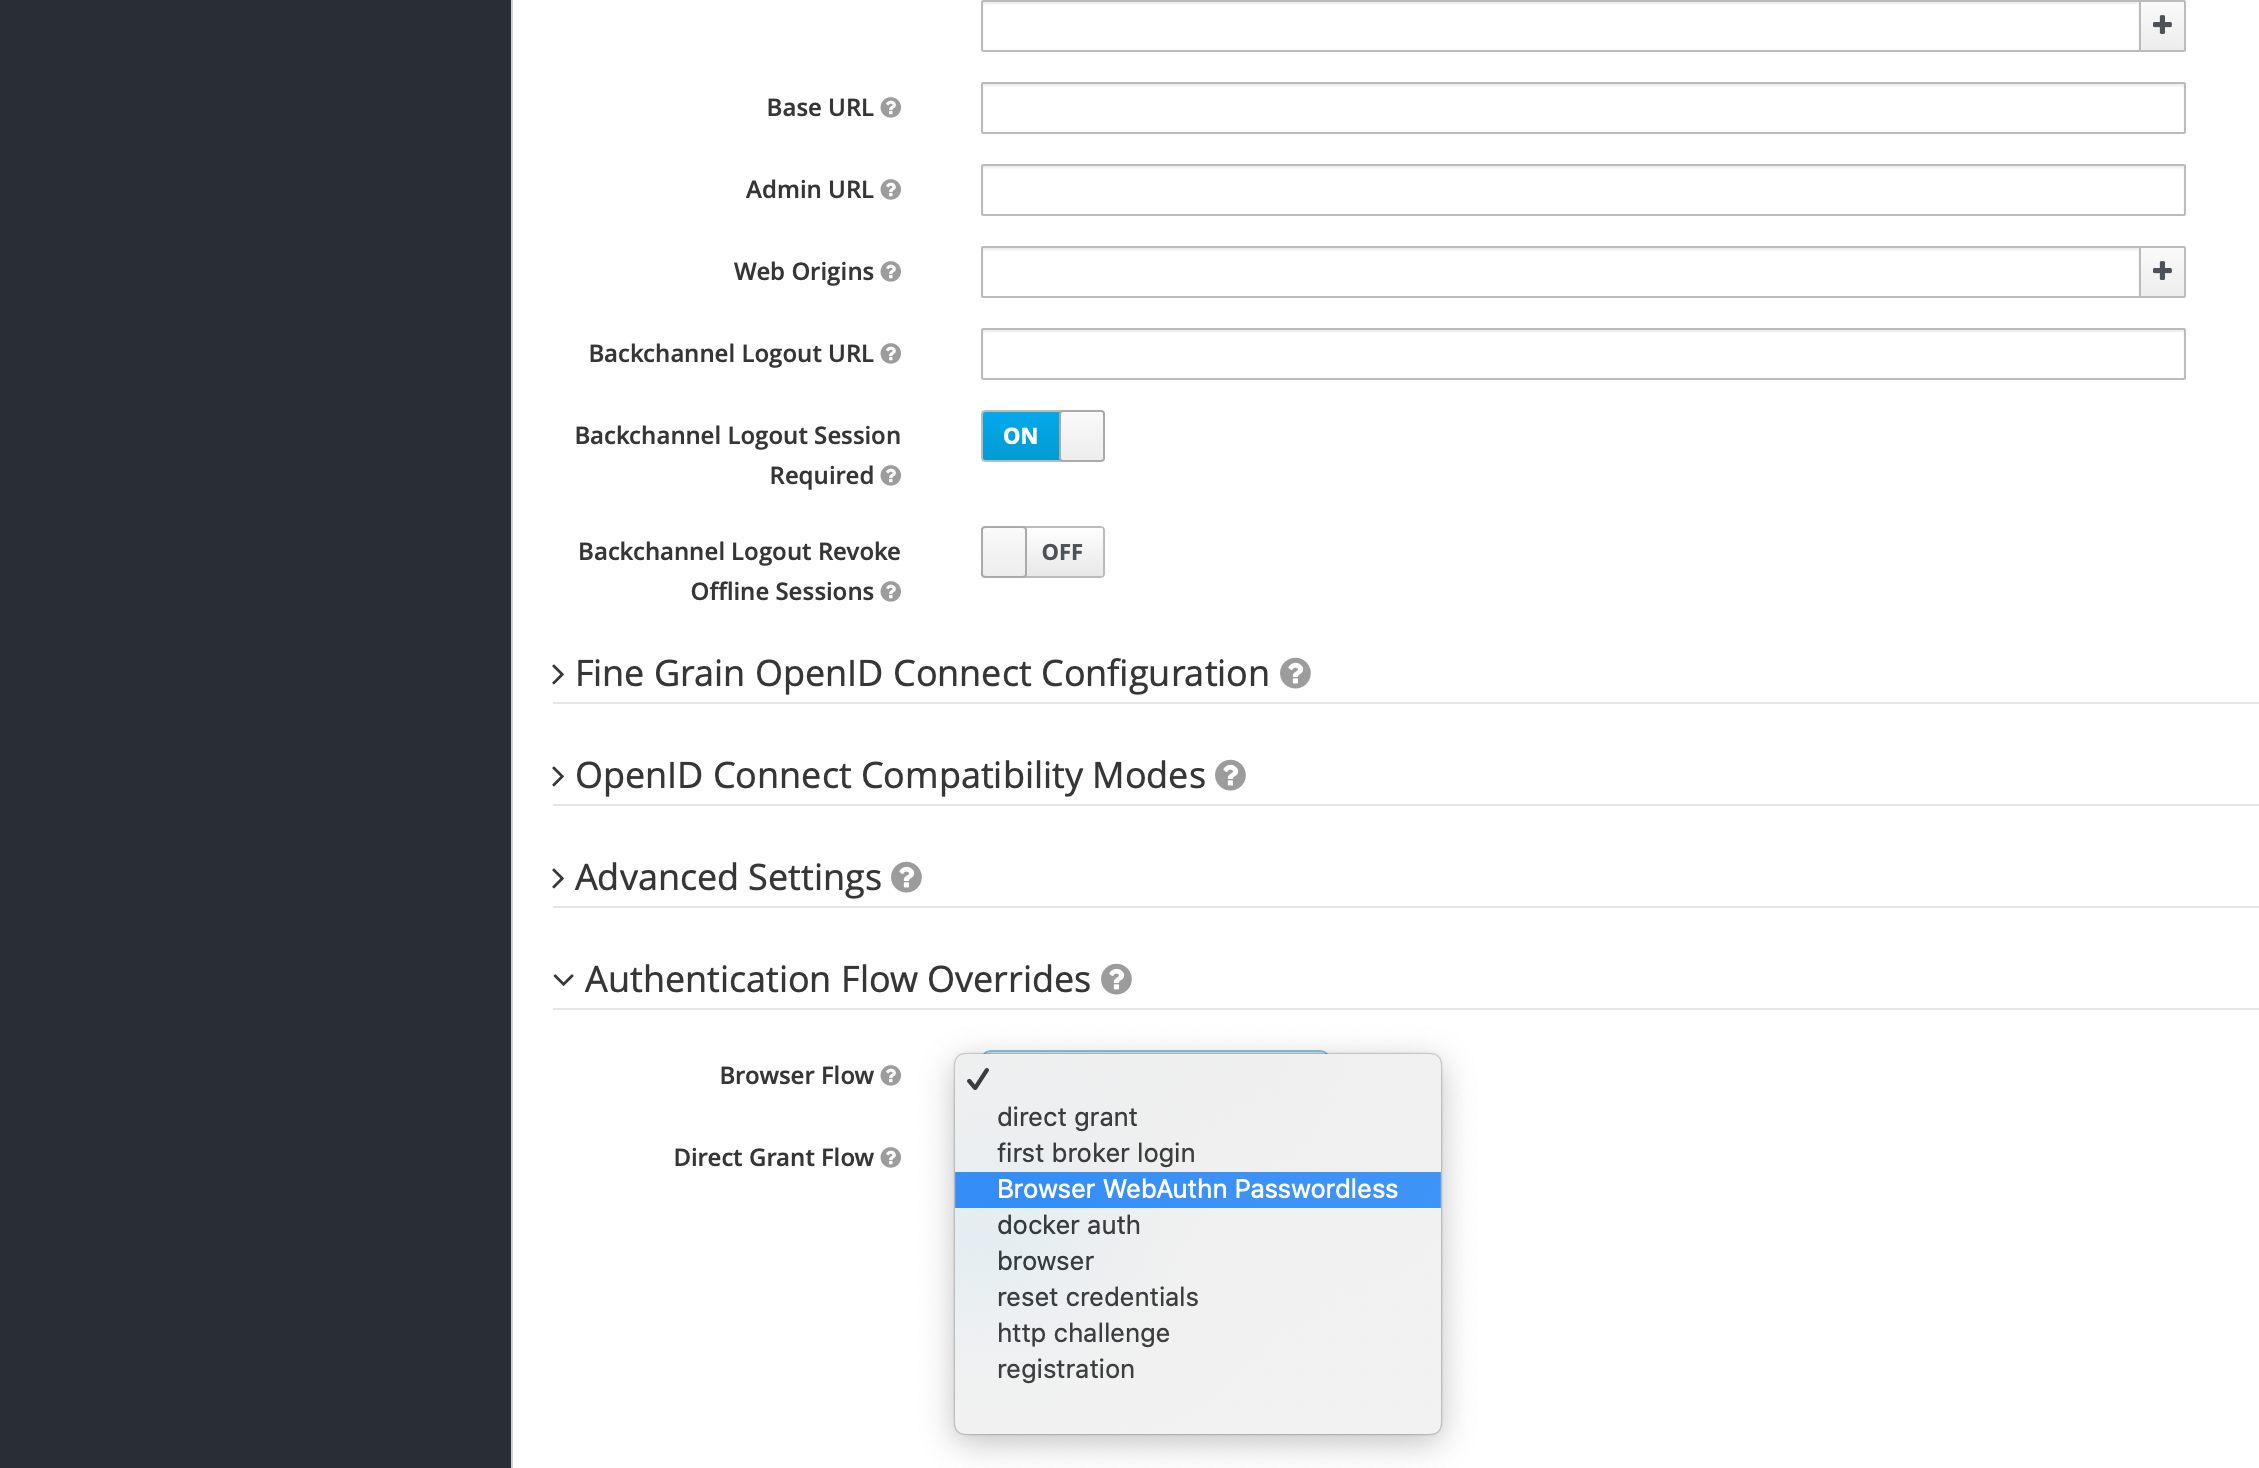
Excellent, we're done with updating our new Authentication Flow and now we need to make sure that we're using that flow when we log in to our FileMaker database. So, click Clients from the menu on the left and choose the Client for the FileMaker Server you created in Part 5 of our Keycloak series. Scroll down to the bottom where you'll find the Authentication Flow Overrides section and in the Browser Flow drop down, choose the new flow you created earlier and click Save:
Logging In As A User
If you now open FileMaker, click to open your Keycloak configured database and hit the Keycloak button on the FileMaker log in prompt, your browser will open as before and you'll be prompted for your username. Enter this and continue, and then you should see the following prompt (note, depending on the browser being used the message may be slightly different):
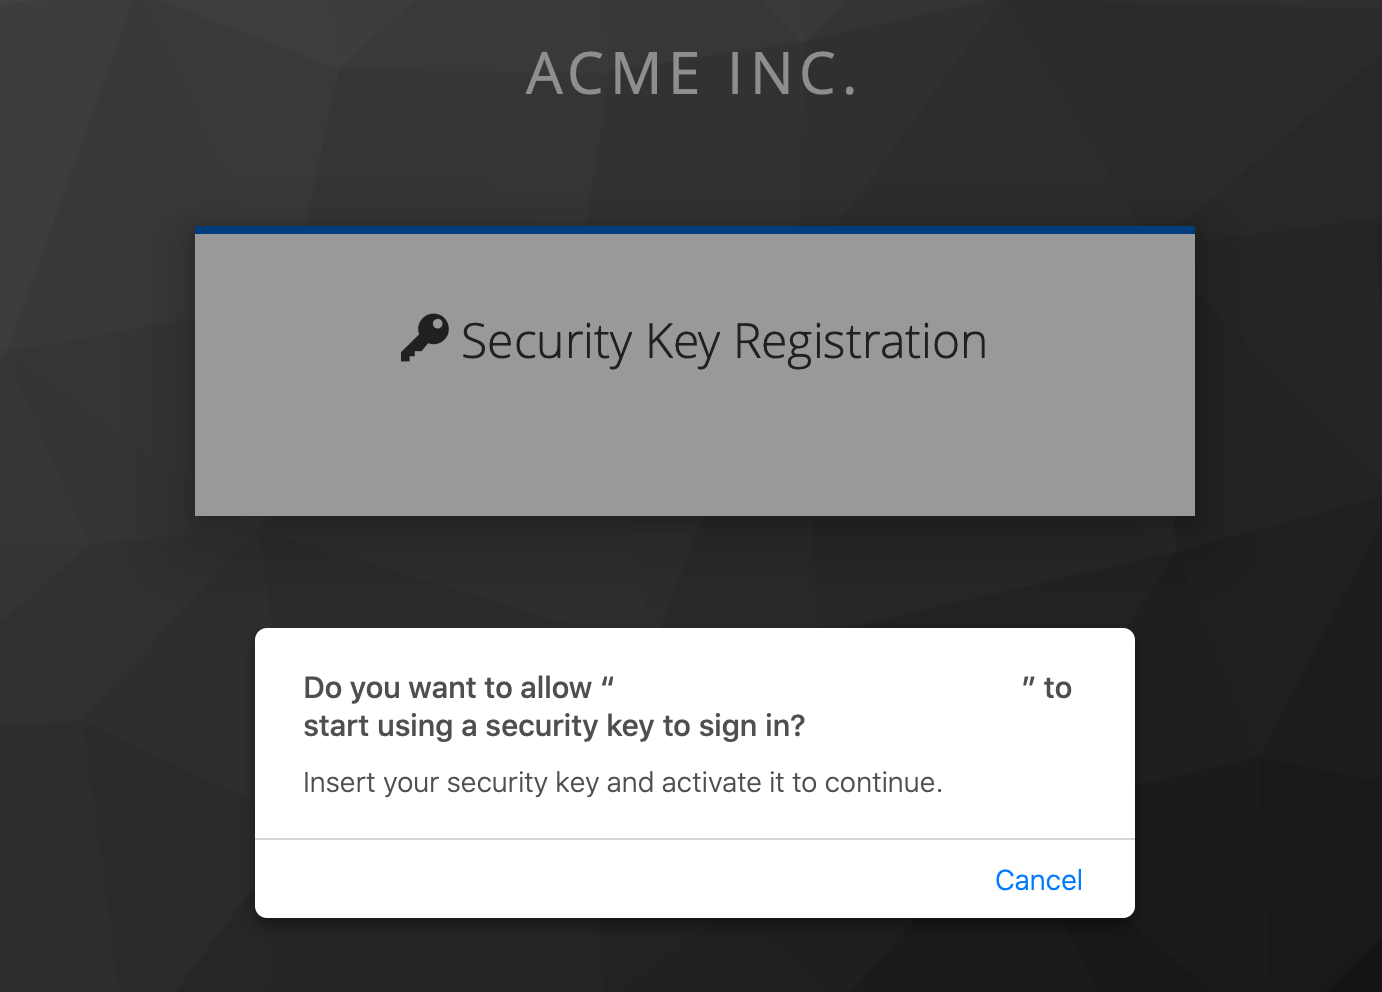
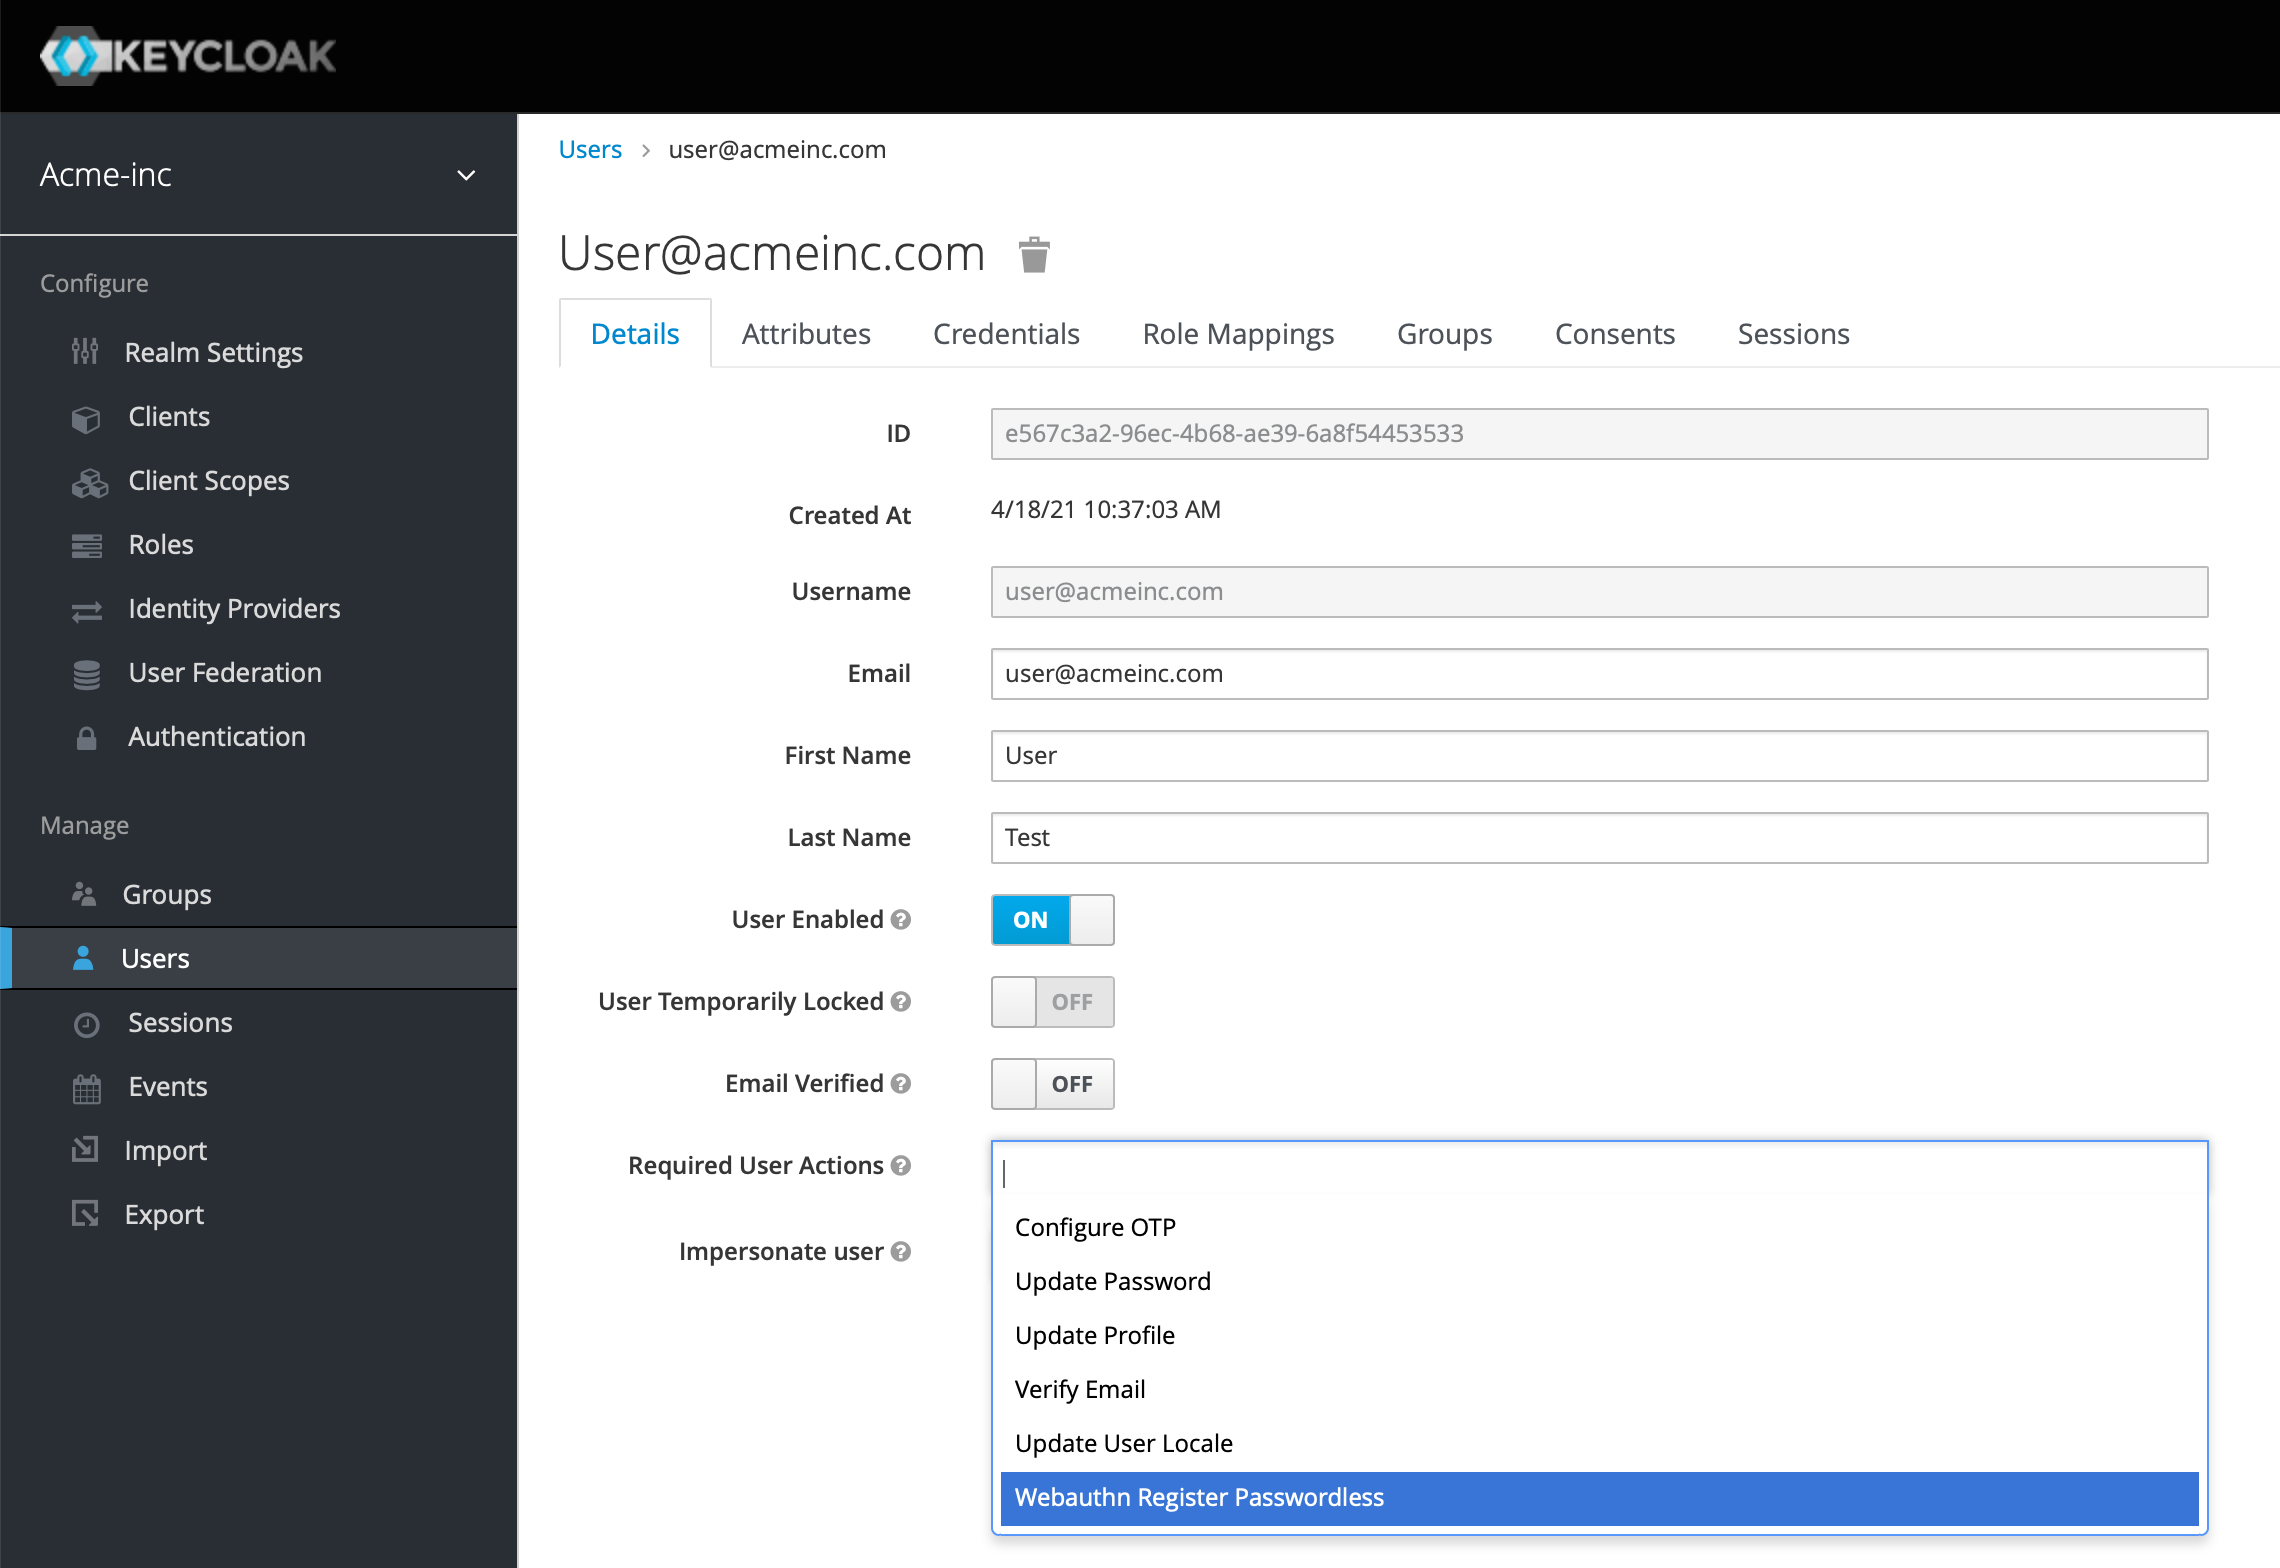
If you don't see this, it's possible you'll need to update existing users to be prompted to register their password-less authentication key, and you can do this by going to the Users in Keycloak and adding a Required User Action as below:
Back to our dialog prompt above, if you now insert your YubiKey into the appropriate port on your computer (we actually inserted it into a docking station USB-C port and it worked fine there too), you'll see the Y in the gold touch pad start blinking green. Touch the blinking Y with your finger and you'll be prompted to name your key.
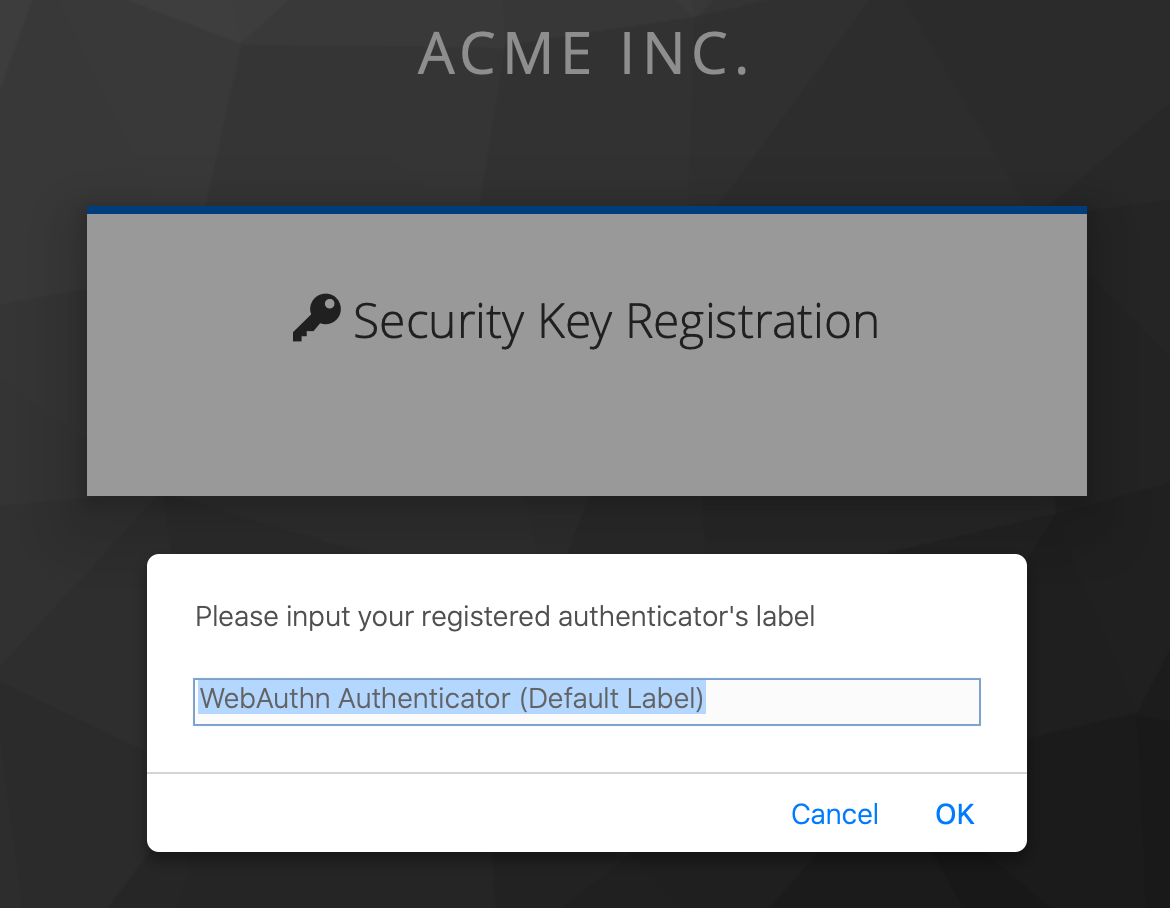
Name it something entirely appropriate, click OK and voila, depending on your browser you may be prompted if you want to allow this page to open FileMaker Pro as we have seen before, but we're in! Come on, that's pretty cool right? If you want to test this process again, you can head over to the User in Keycloak, go to the Sessions tab and click Log Out All Sessions. Also, under the Credentials tab of the user, you will find the entry for the YubiKey and you can delete this entry to test registering again.
One More Thing...
What if you're super paranoid about your data? Well, first up, congratulations. And second up, what if we introduce multiple factors of authentication? If you've been following the series, in the last post we set up an autheticator app, so let's use that as well as our new YubiKey and the username and password to really throw off the hackers... Holy smokes, let's do this...
Head back to the Keycloak Administrator Console, ensure you're on the correct realm and choose Authentication from the left menu. Make sure you're on the Flows tab and in the selected flow in the drop down, select the Browser WebAuthn Passwordless flow we created above. Copy this using the button as we did before, name it MFA Flow or something suitable.
Now, just like we did before, remove the Username Form and add executions for Username Password Form and OTP Form and use the arrows to put them in the same order as below.

Finally, as we did before, head over to the Client and Settings tab, scroll down and update the Authentication Flow Overrides so it's selected to be the new flow you just created.
Make sure your user does not have an active session in Keycloak and then log into your database. You'll be prompted to:
- Firstly, enter your username and password
- Secondly, touch your YubiKey
- Thirdly, enter the 6-digit code from your authenticator app
Wowzers! Is that too much? Not necessarily, depends on your security stance, but it does demonstrate just how much more we can do with Keycloak than native FileMaker security. Play around with flows and see what works for you.
Summary
The first time you log into a FileMaker database securely without entering a password is pretty eye opening - why aren't we all doing this already? There's plenty more to Keycloak that we've not explored yet and more articles are likely on the way. But we as FileMaker developers and deployers can up our security game and use the latest in security technology to protect our, and our clients', data and we hope this series will inspire others to follow this path.

